Asset
Parts of an Asset
- Asset Name- (Brand Model)
- Asset Tag – (PCOM-SerialNumber)
- Serial # – (ex. 4Y1DP13)
- Model – Asset’s model (ex. Surface, Mac mini. Latitude 5400, etc.)
- CAM’s Tag – tag given to devices that are more than $5000
- Notes: any notes that you might want to add about the device
- Location: Nelson Hall – Suite 2400
- Depreciation: how long the device is usable for

Creating Assets
- To create a new asset, click on the “Total Assets” option and click “Create New“ on the top right corner.
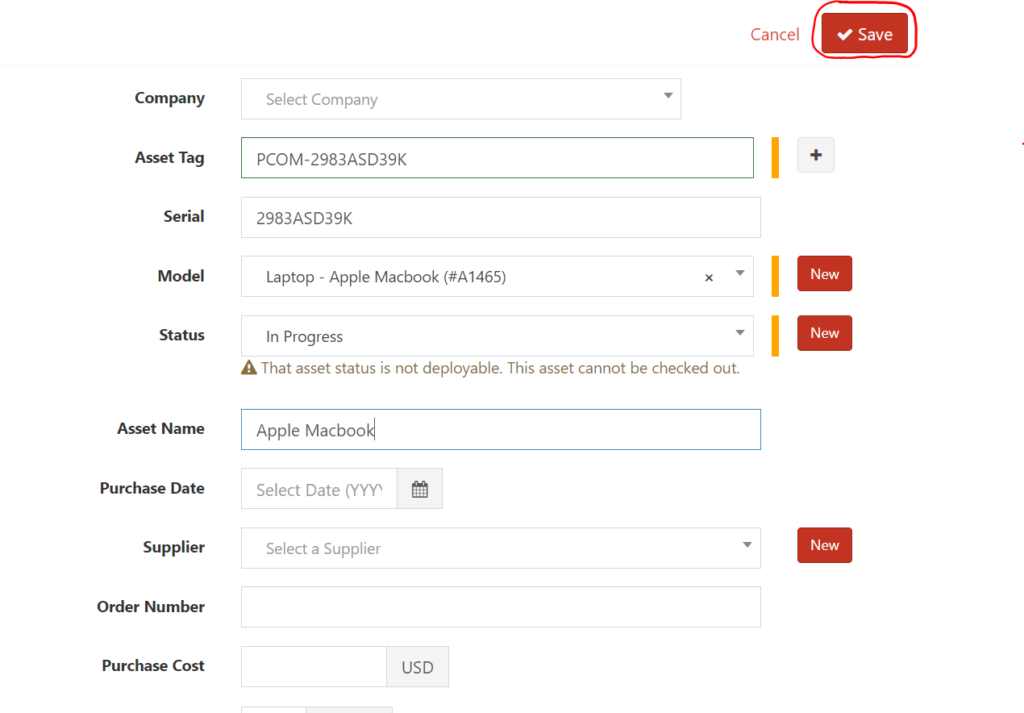
- Fill out the following fields (Lenovo ThinkPad X1 as example):
- Asset Tag: PCOM-SerialNumber
- Serial: Serial # of the asset
- Model: Select an appropriate model from the dropdown list, such that the brand, model, year of manufacture and any other details match perfectly. In case you do not find a match, click on the “New” button and create a new model as required
- Status: In Progress (while the asset is being set up), Deployable (once the asset is setup and ready to be used)
- Asset Name: Brand Model (Example, Apple MacBook Pro, Lenovo ThinkPad X1, Apple iPad Air)
- Save Asset
Tagging and Labeling Assets
Once an asset is created on SnipeIT, it has to be labelled immediately.
To label an asset, please use the IT Service Desk laptop/iPad, and follow the instructions below:
- Navigate to the asset on SnipeIT, the last field under the “Info” tab says “Labels”, next to which you would find the “Generate Label” button
- Click on “Generate Label”, this should take you to a new page which shows the unique QR code generated for the asset
- Follow the instructions here to print the label
- You should be able to print the label which displays the QR code, Serial Number and Model for the asset
- Once the label is printed, stick this on the front side of the device (remove any existing/old labels from the device). DO NOT STICK THE LABEL ON ANY SORT OF OUTER PACKAGING, MAKE SURE TO LABEL THE ACTUAL ASSET/DEVICE
- After labelling the device, put a blue tape on it that mentions what has been done, and the next steps. Eventually, this would have to be moved to the “To be set up” closet, and the moved to the “Ready to be deployed”/”Ready to be picked up” closets accordingly
Check-Out
- Select the asset on SnipeIT
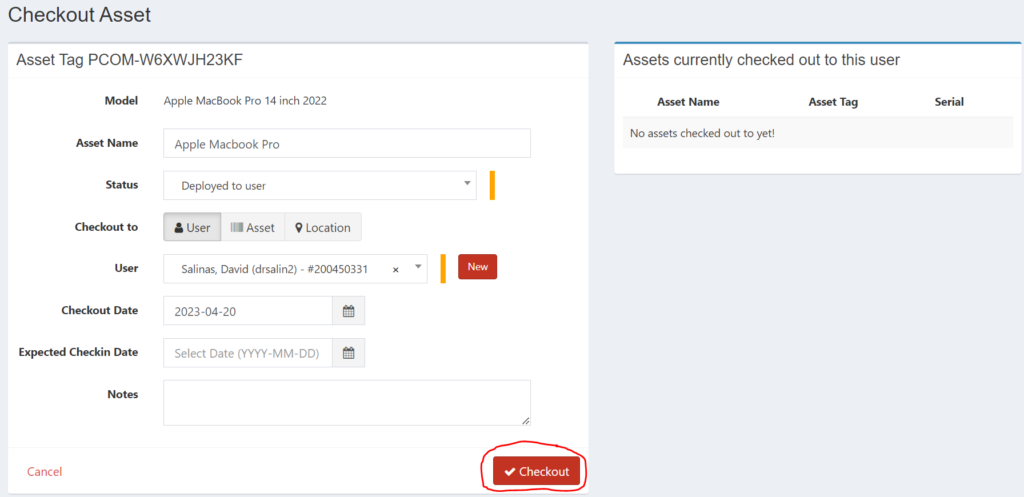
- Click on “Actions” –> “Checkout Asset”
- Change the “Status” to “Deployed to user”
- Under “User”, enter the user’s Unity ID. If it is not present in the dropdown, click on the “New” button next to the field and create a new user with their first name, last name, unity ID as username, and ask them to set a password/set a default password and save.
- Add any notes if required, and select “Checkout”
- Once the asset is checked out, make sure to change the Asset Tag to “PCOM-UnityID-BrandModel”
Check-In
- Select the asset on SnipeIT
- Click on “Actions” –> “Checkin Asset”
- Change the “Status” to “In Progress” (Since it has to be re-imaged and setup before it can be ready for deployment again)
- Add any notes if required, and select “Checkin”
- Once checked in, change the asset tag from “PCOM-UnityID-BrandModel” to “PCOM-SerialNumber”
- Place the equipment in the “To be set up” closet in the student leads room, with a blue tape on it that mentions the next steps to be followed/status with respect to the device

Asset Naming Convention
General Format: PCOM-SerialNumber
When checked out to user: PCOM-UnityID-BrandModel
For a comprehensive list of Brands and Models, click here