Service Now
What is ServiceNow, how does it work, and why do we use it?
ServiceNow is a website that houses requests for IT related support. When students, faculty, or staff have questions or need help installing software, ordering equipment, fixing their computers, etc., they submit a request on our NC State IT Service Portal. From there, a ticket is generated and we can view and respond to these tickets in ServiceNow. ServiceNow allows us to communicate with people that send in tickets to resolve their IT related issues.

↓

Creating a ticket
Sometimes when people utilize our walk up service desk, we cannot resolve their issue right away. Let’s say someone came in because their laptop speakers aren’t working, but we discover that the laptop is quite old and the speakers would need to be replaced entirely. In this case, we would most likely set up a meeting to discuss potential options for purchasing a new laptop and provide the faculty or staff member with a loaner laptop until the new one comes in. To document this interaction, we can create a ticket in ServiceNow and continue updating it as needed. Here’s how to create a ticket:
- Open ServiceNow
- Open the Incident tab
- In the top right of the screen, click New

- Fill in the “Caller” by typing their name

- Assign the ticket to yourself or whoever is working on this incident

- Add a description. This should include the interaction at the service desk and where we are in the process of resolving the incident. For example, “Chavis came by the service desk on the afternoon of 1/30 because his laptop speakers were not working. After some troubleshooting and looking up the service tag, I found that the laptop is still under warranty, but it’s quite old. Since the laptop is from 2015, we decided to go ahead and upgrade Chavis to a new laptop. I checked out a loaner machine for the time being and we are sending his old machine to be fixed and It will be used as a loaner when we get it back.”

- Add a short description. This is what we see when we scroll through ServiceNow, so make it something short but descriptive. An example is “New laptop order for Chavis Crawford”

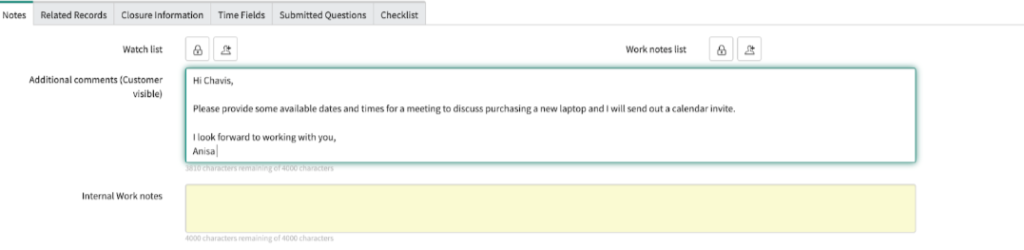
- Post additional comments. These notes will be visible to the customer.
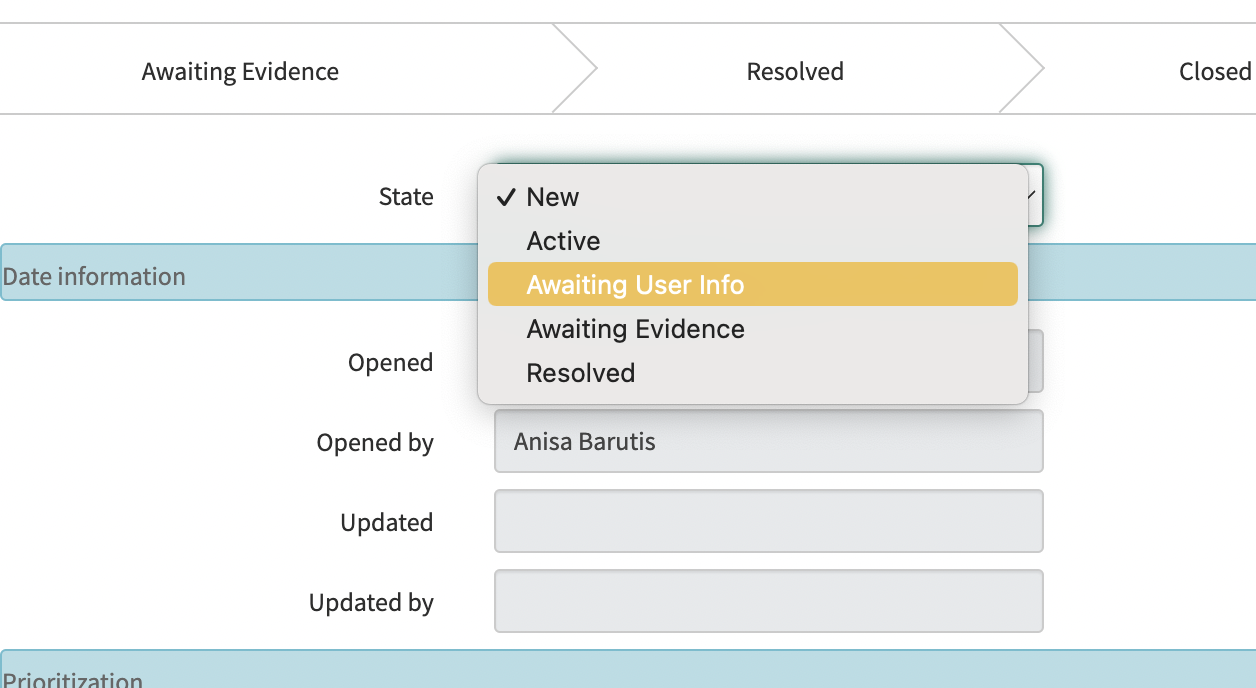
- Change the status to “Awaiting user info” and click “Save” in the top right corner.
Closing a ticket
- To close a ticket, type a closing remark in the additional comments box, but don’t post it. This comment should be along the lines of:
“Hi Chavis,
I’m going to close out this ticket now that you’re all set with your new laptop. If you have any questions, feel free to open another ticket or utilize our walk in help desk and we will be happy to assist you.
It was great working with you, Anisa”
- Once you’ve written the note, open the closure information tab.Click the dropdown menu beside the close code and select “Solved (Permanently)”.

- Scroll up to the top of the page and on the right side, change the state to resolved.

- Click “Save” in the top right corner.
Internal Work Notes
When we need to update a ticket with information for the IT team but not for the customer, we post in the internal work notes of the ticket. These posts appear in the comment thread but they are outlined in yellow which tells us that only those of us working at the IT desk can see them. If we have a ticket for ordering equipment, the work notes are used to give updates on shipping and where we are in the process of getting the new equipment to the user.
Templates
We use templates as standard responses to reply to the very first comment on a ticket and for common questions and requests we receive.
- To access the templates, open a ticket and click on the 3 dots on the right side of the menu bar at the top of the page.
- Click “Toggle template bar”. The template bar will appear at the bottom of the screen.
- Click on the template appropriate for the ticket and it will be applied in the text box.
- Fill in the missing information in the template and post the comment.
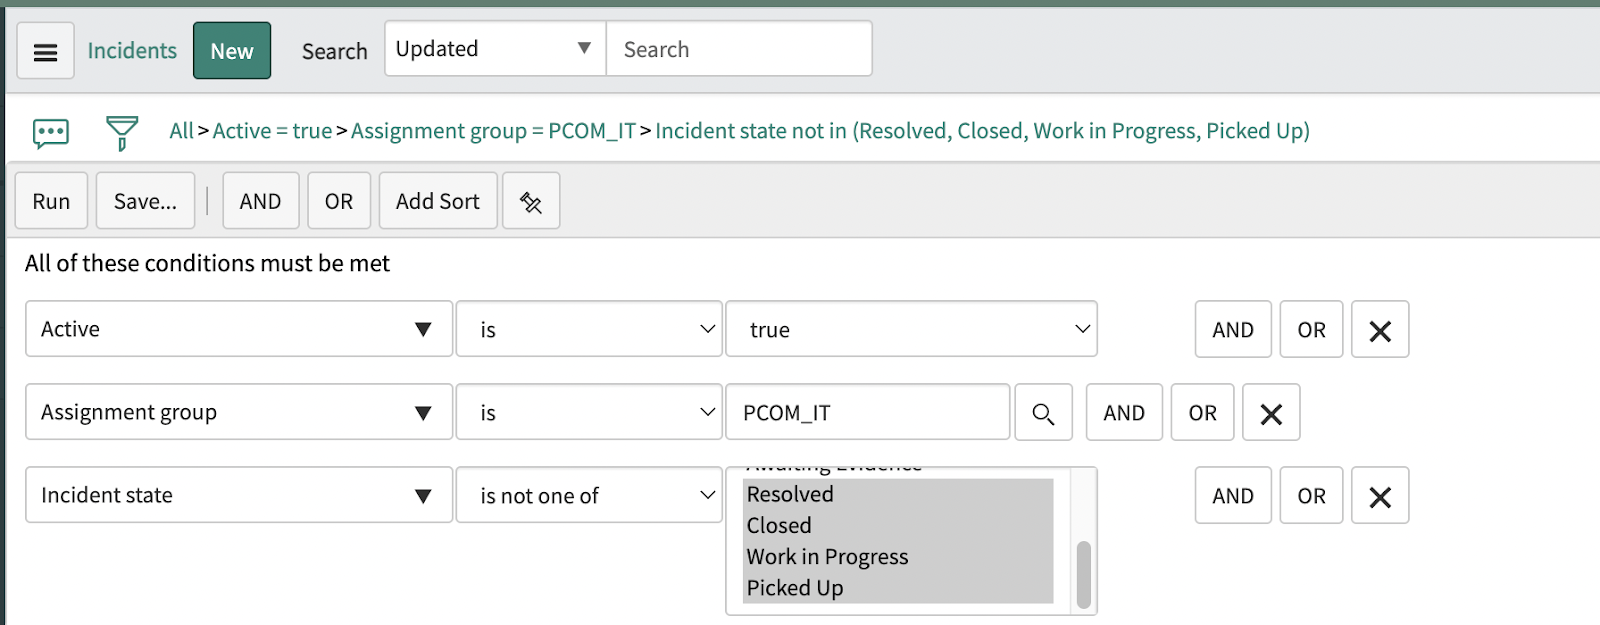
Incident filter
Applying this filter removes closed and resolved incidents from the list so you are only looking at active tickets.